Tutorial: Medusajs on Railway - DIY ecommerce, has never been easier!
By following this tutorial, you will have a fully operational ecommerce solution; webshop, order and pruduct management - up and running, on a server that you manage. Medusajs is an amazing open source project, that by the time of writing this tutorial, is mature enough to replace most of the functionality offered by popular paid ecommerce solutions like shopify, woocommerce etc.
Tutorial overview
Difficulty: 4 / 10
Estimated time: 20-30 minutes
Credit Card required: Yes, $5
What will you have after this tutorial?
Here is a the webshop I created while writing this series of tutorials, check it out: 😶🌫️ the demo shop has been discontinued, (stay tuned for medusa 2.0 demo)
Step 1: Sign up to GitHub and Railway
If you don't already have a GitHub account, head over to https://github.com/ and create a user.
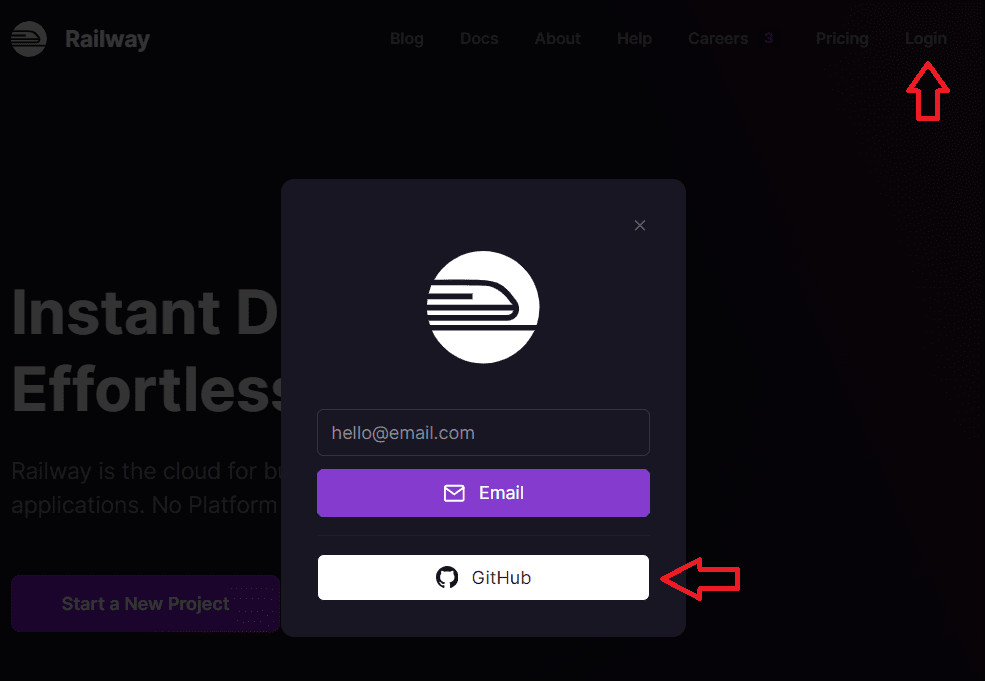
Once you have a GitHub account, you need to connect it to Railway. Head over to: https://railway.app/ and sign in with GitHub
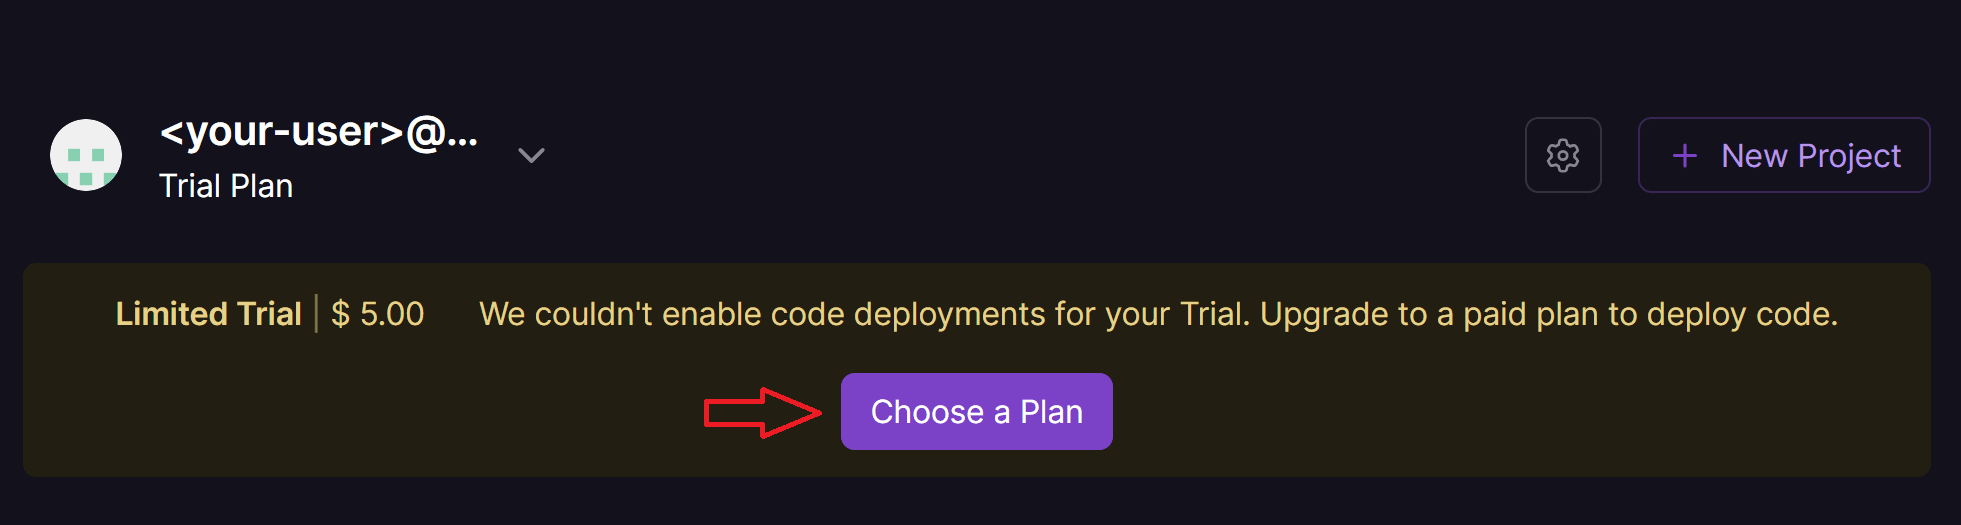
Once you are signed in, and have accepted Railways terms and conditions, you will find the page shown below. You need to upgrade to at least the "Hobby plan" in order to proceed with this tutorial. By the time of writing this tutorial, the hobby tier is $5/mo
Step 2: Deploy medusajs template on Railway
We will go straight to the hosting, and will be setting up local development environment later. I have chosen to use Railway for hosting, because they offer a hobby plan that is very cheap compared to the average paid ecommerce solution. And because Railway allowed me to create a one-click deploy template for this project - so you don't have to do much.
 updated 21-06-2024
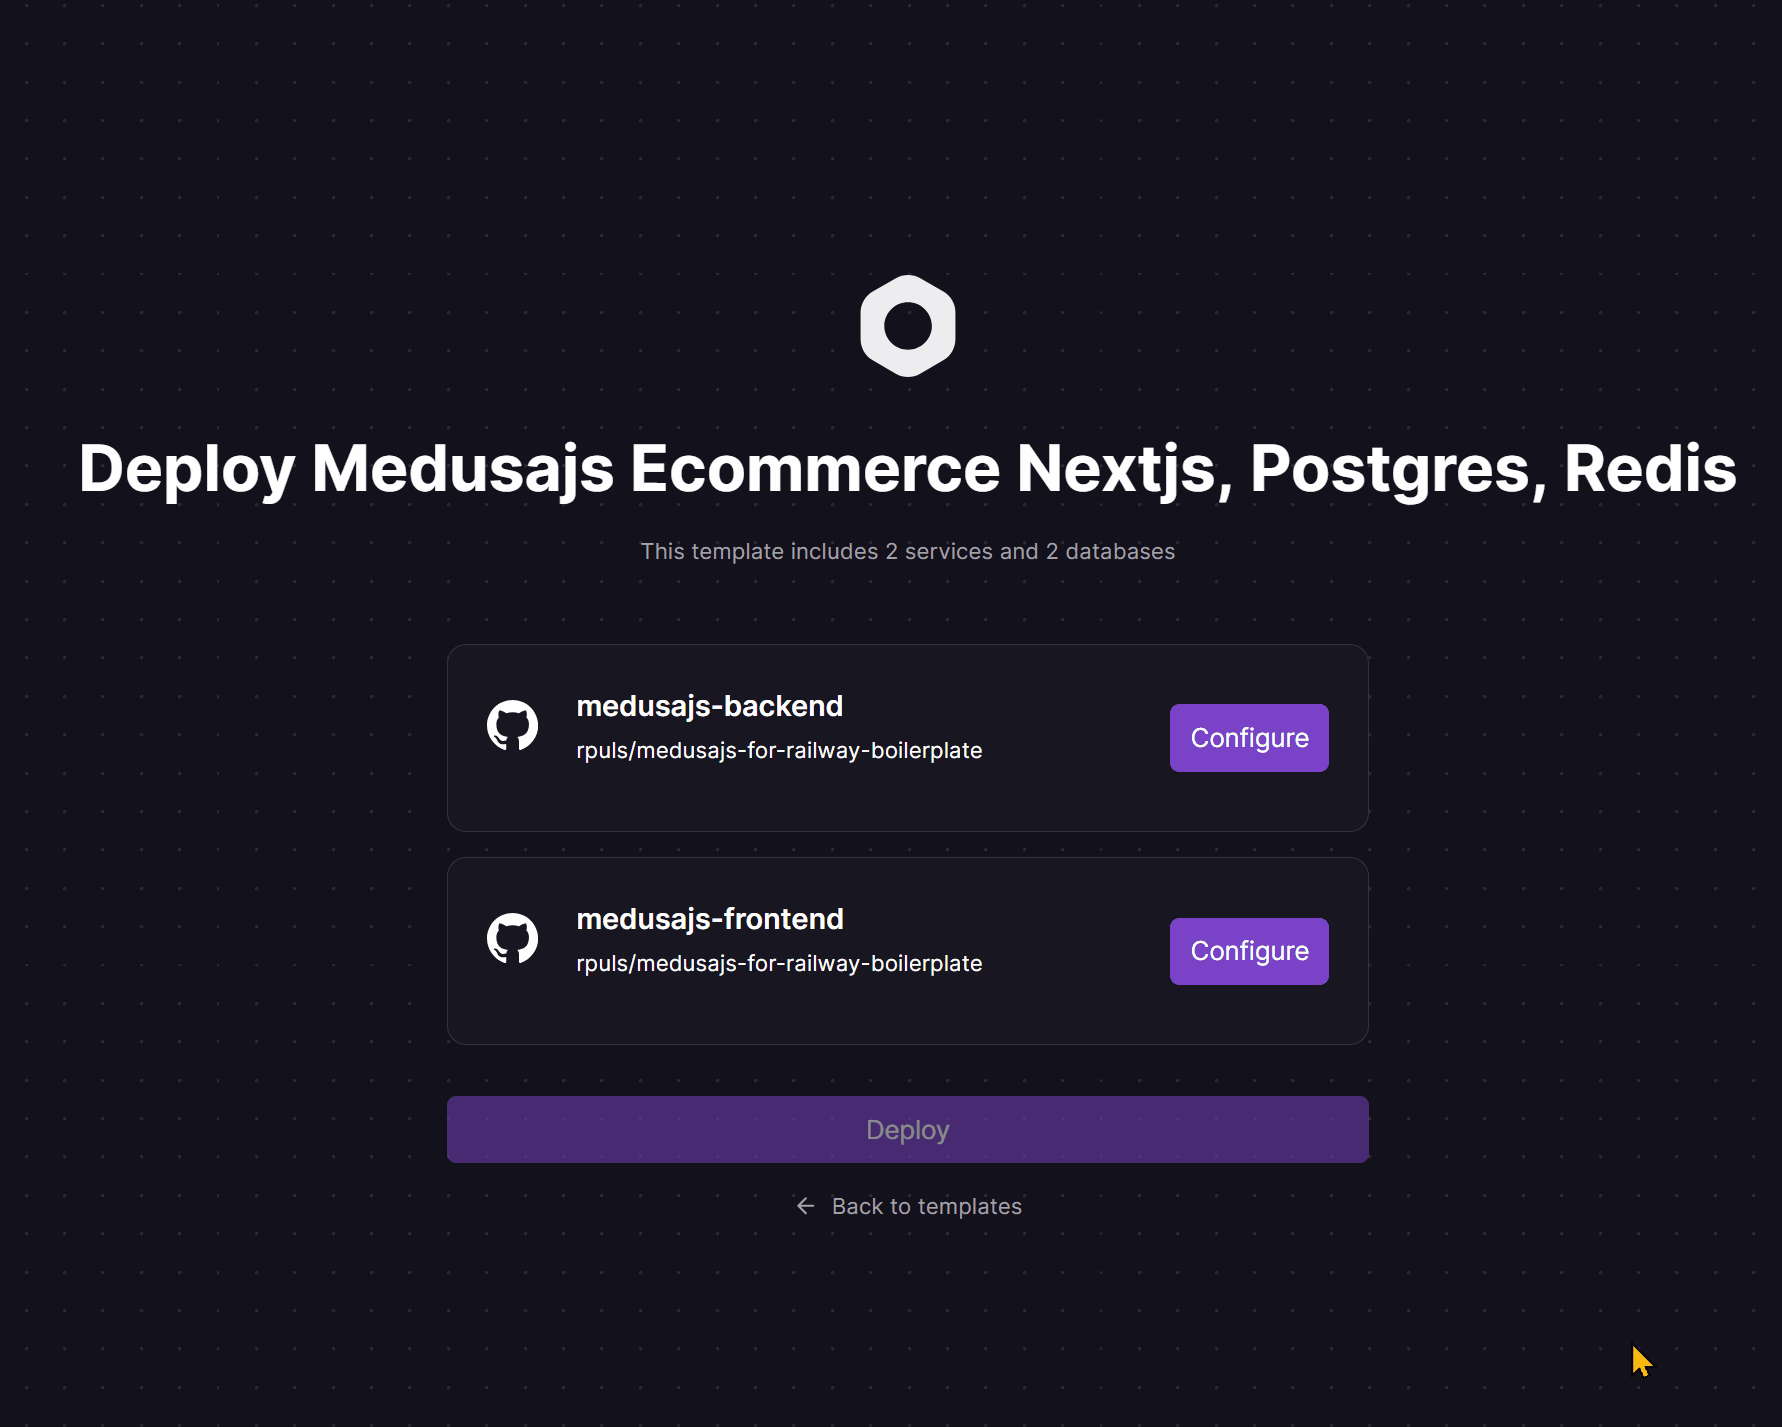
By clicking the button above, you will be taken to the deploy page:
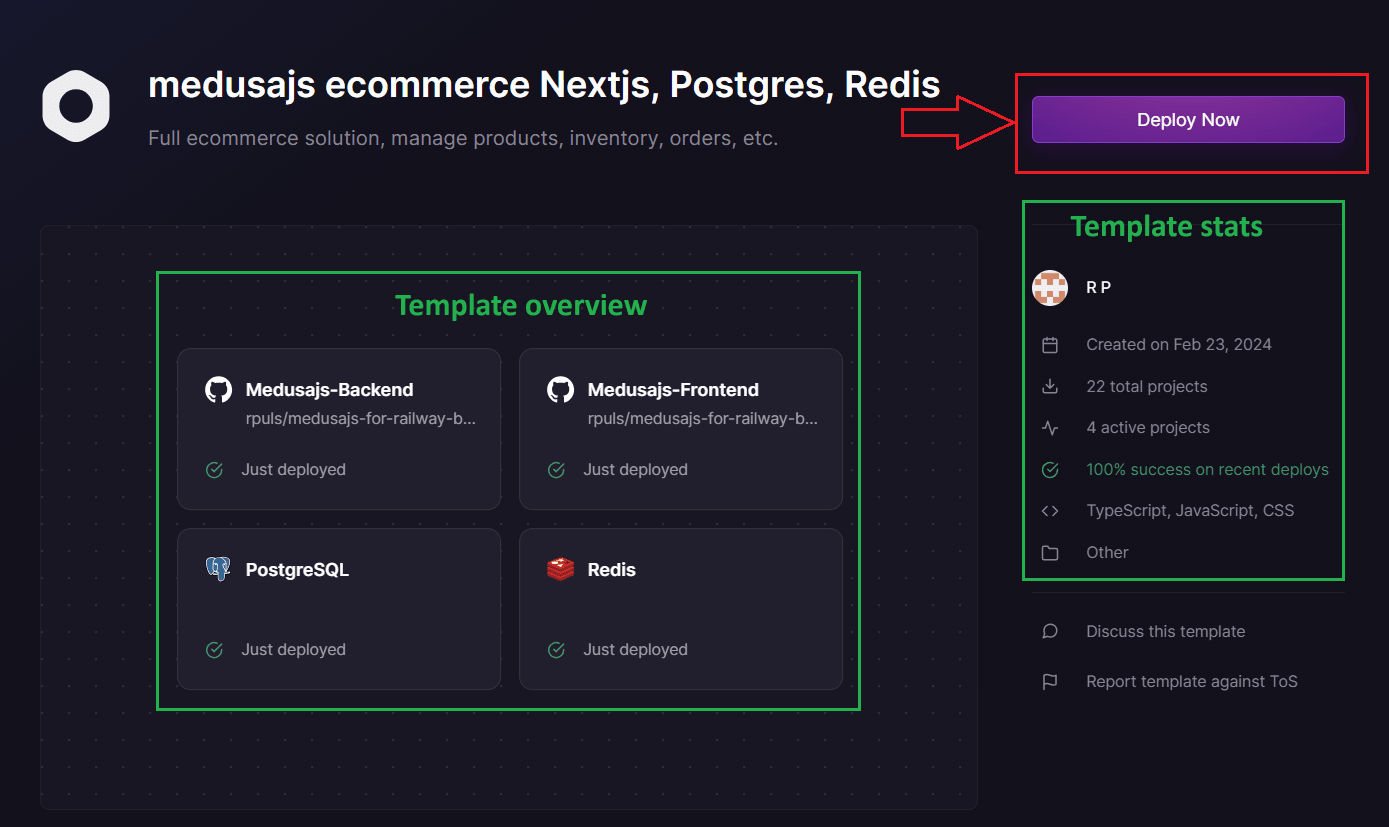
After clicking "Deploy Now" you need to confirm the pre-configuration of backend and frontend services.
Once you click the Deploy button, you're in business! You will get a project canvas and your app will start to build. It should that looks like this:
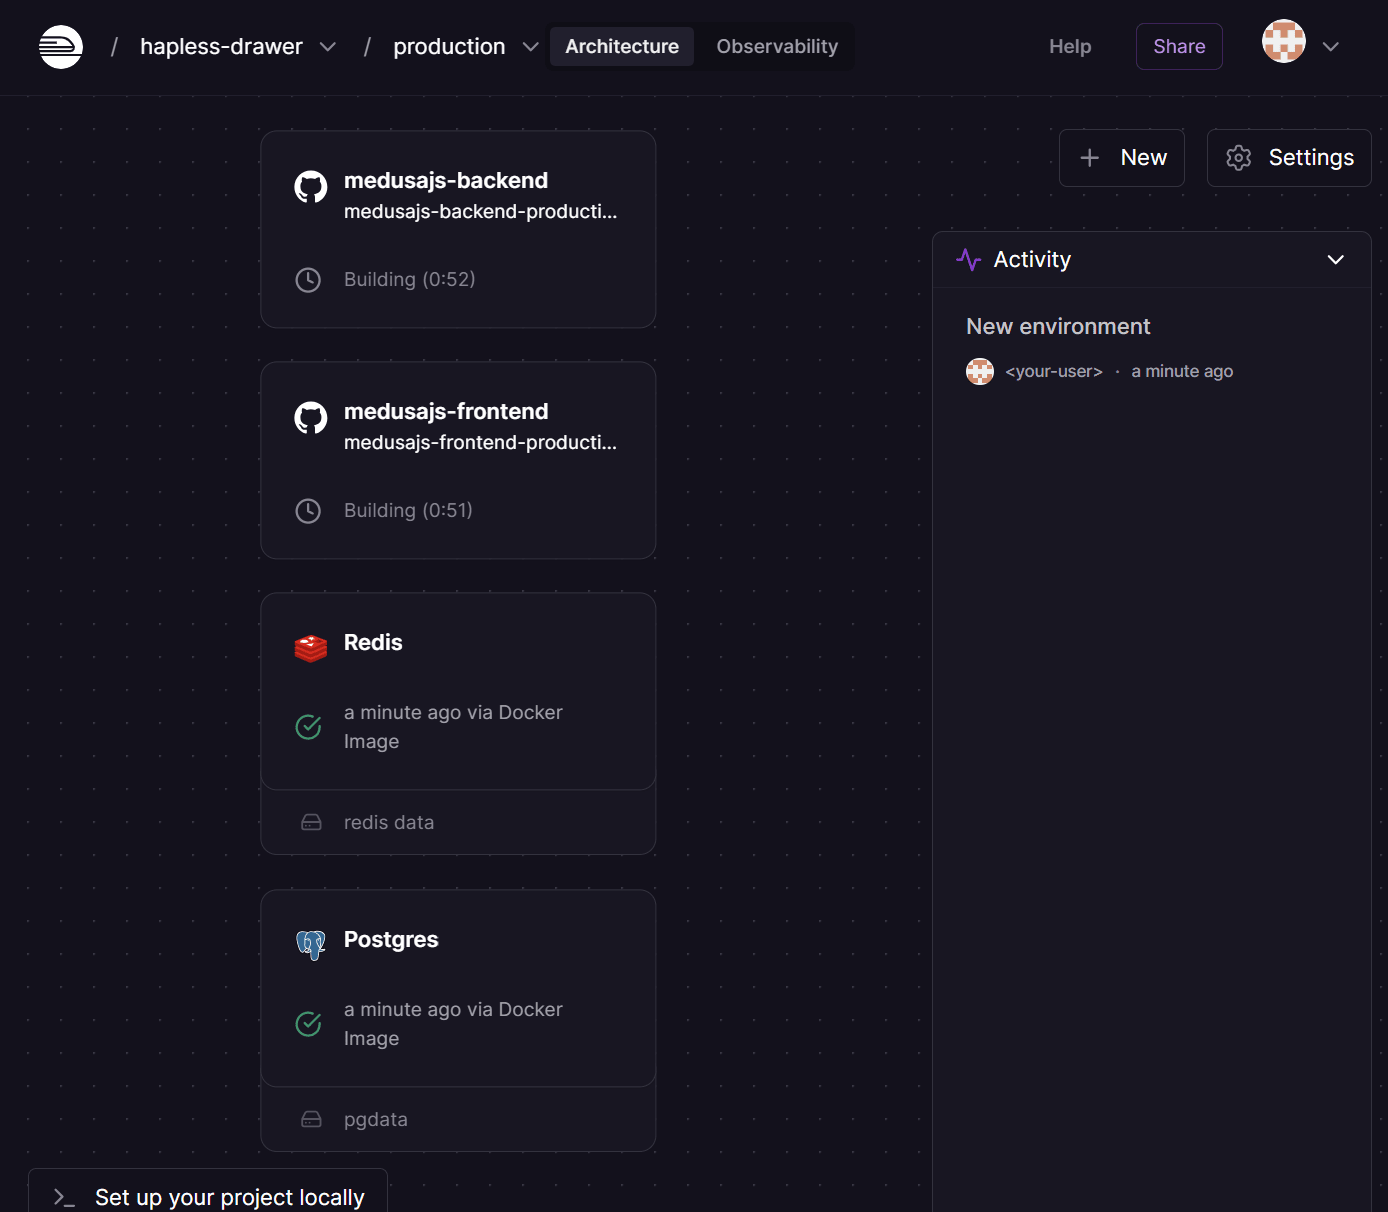
Within a minute your Postgres database and Redis instance should be ready. The two medusajs (Nextjs) apps however, will take a long time to build. The backend needs to finish a number of build steps which can take up to 7 minutes - maybe even longer. The frontend cannot build before the backend has finished, this is because the nextjs app will build pages based on data served from the backend. The entire process should hopefully not take more than 12 minutes.
Once you have 4 green checkmarks your app is hosted! However, in order to really use it, there's one more building blocks we need to add.
Step 3: Add a media storage service
If you would login to your admin dashboard now, create a product and upload a few images it would work. However, those images would be saved on the disk (Railway's server) and would not be persisted after your next deploy. Therefore, we need to add an external storage provider, and in my opinion there does not exist a better option than Cloudinary. I have been using them for years and years, their customer service is outstanding, they are the most feature rich media service I have ever had my hands on, and... they let you start for free, with a pretty large complimentary usage before you need to pay.
You will need to create a developer account, so head over to https://cloudinary.com/ and click the red button "Sign up for free". From here you can choose to signup with GitHub again, like we did for Railway, but this time it is not required, so feel free to sign up with email or google user.
During the signup, Cloudinary will ask you to choose between two user types, choose the one that is related to "development and api calls"
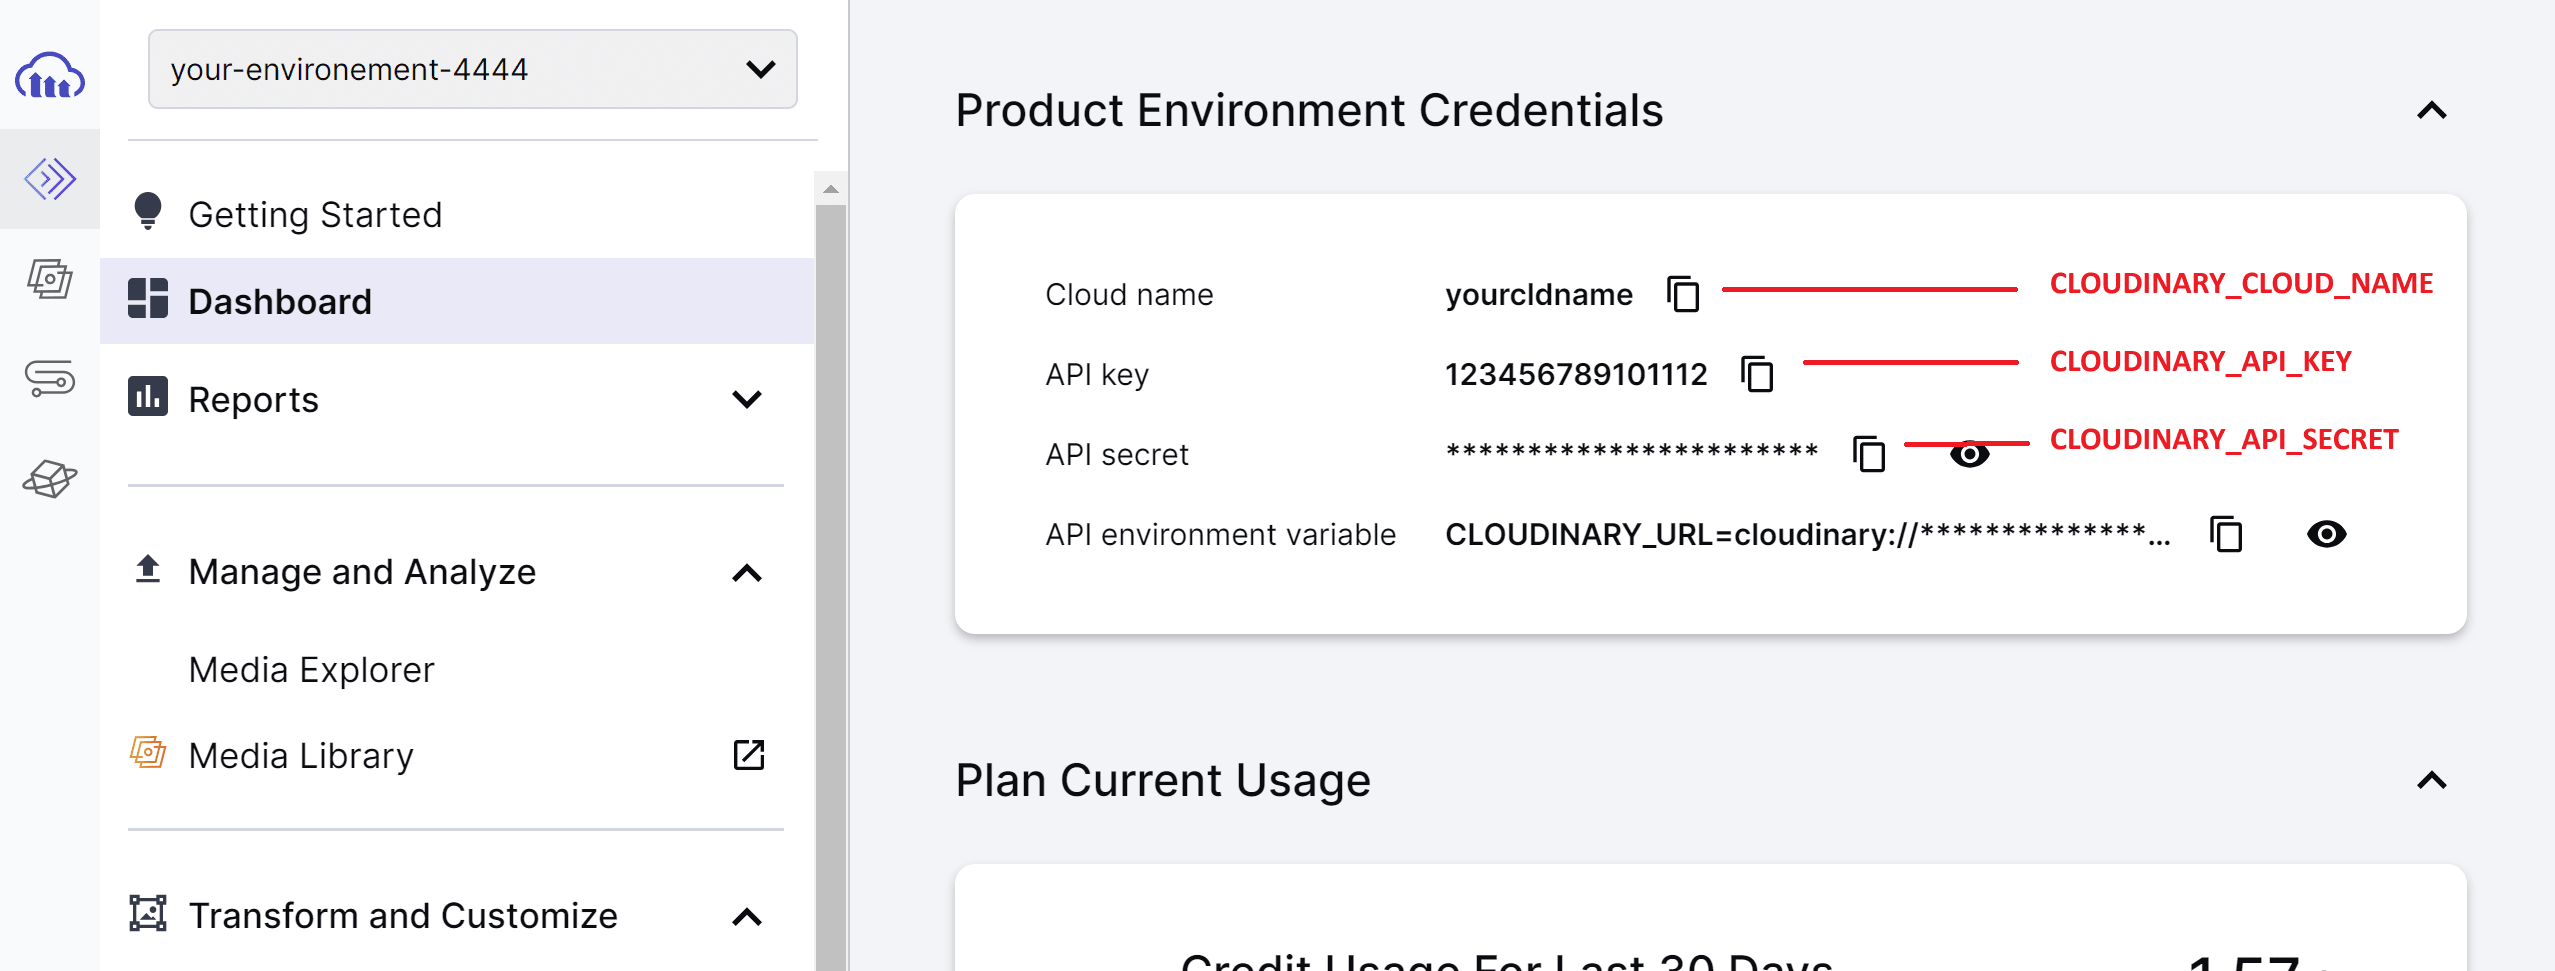
To get your API key, secret and cloud name, go to; Programmable Media -> Dashboard:
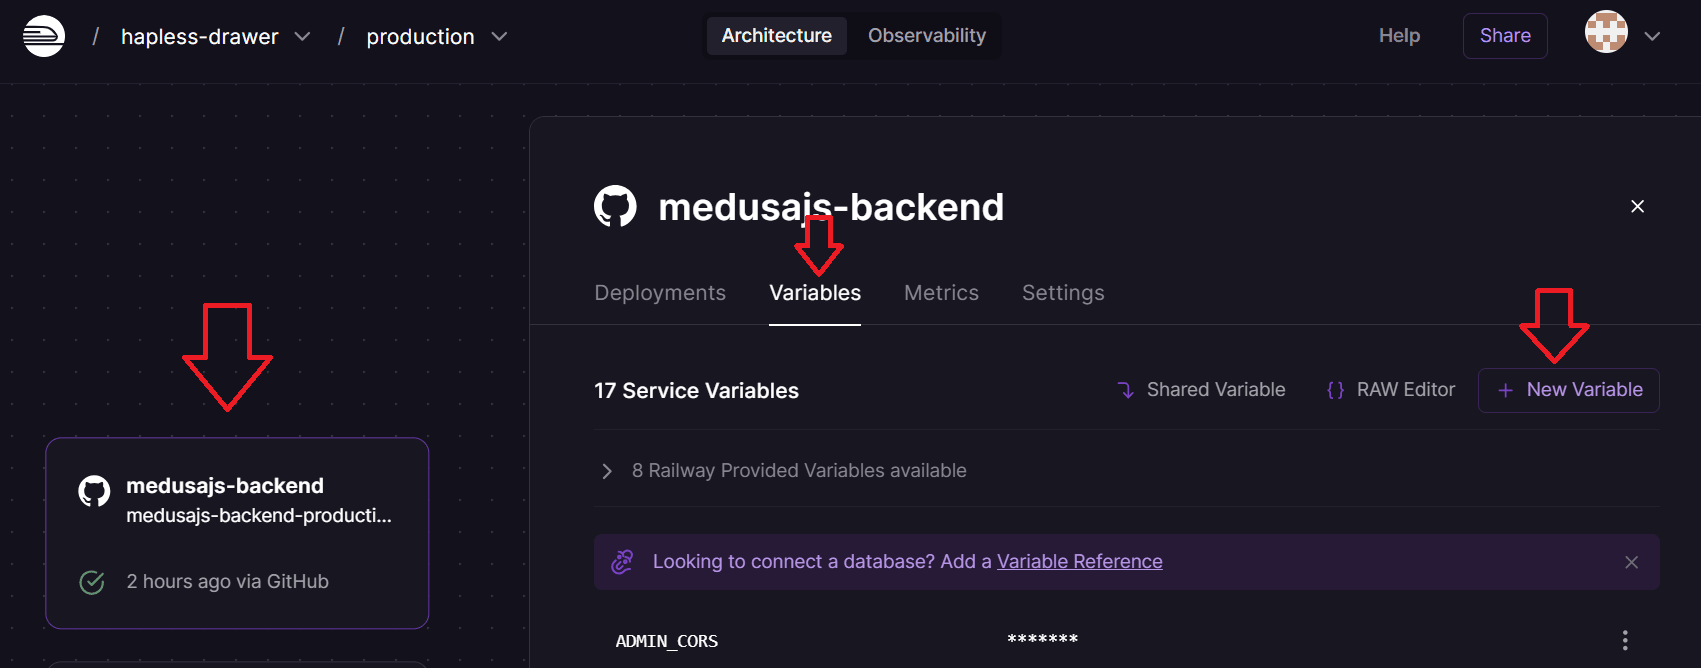
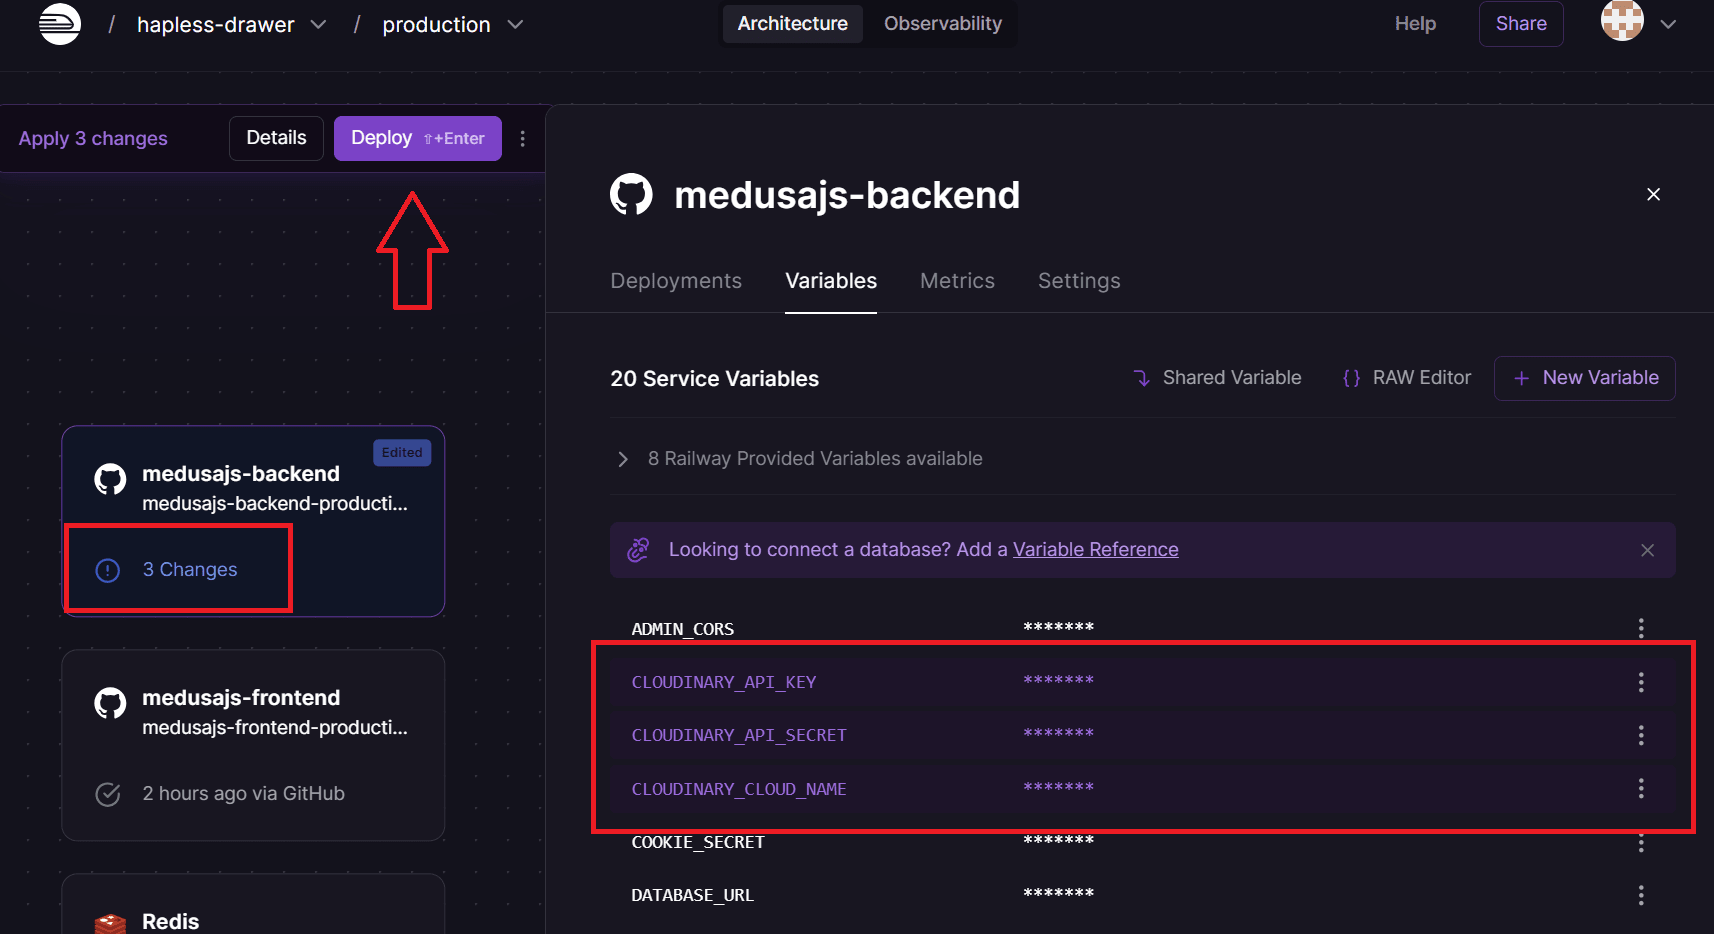
Now you need to add these values to your Railway environment variables, in the backend container:
This is also where you can change the secret value of JWT_SECRET and COOKIE_SECRET if you didn't already do that.
Add the 3 required Couldinary environment variables like so, but use your own values:

Once added, you should see 3 changes in your backend container, these needs to be deployed in order to take effect, click deploy:
Step 4: Setup completed! 🤩
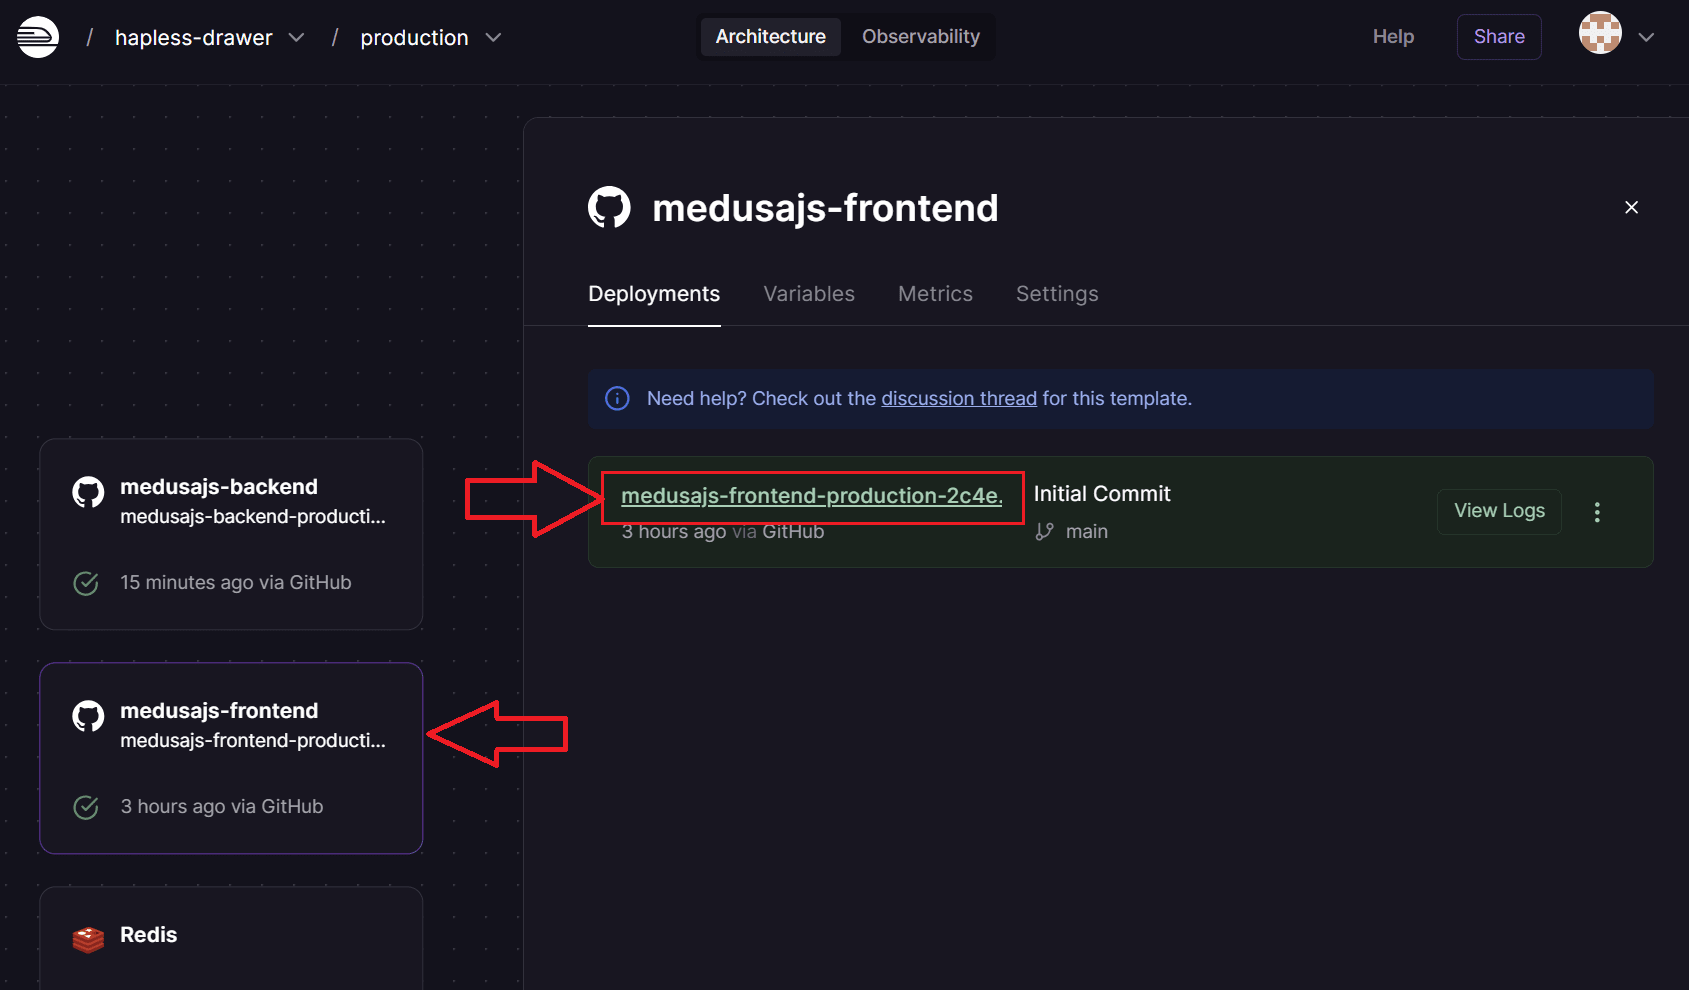
To view your webshop, choose your frontend container -> deployments, and click the public url of the green box:
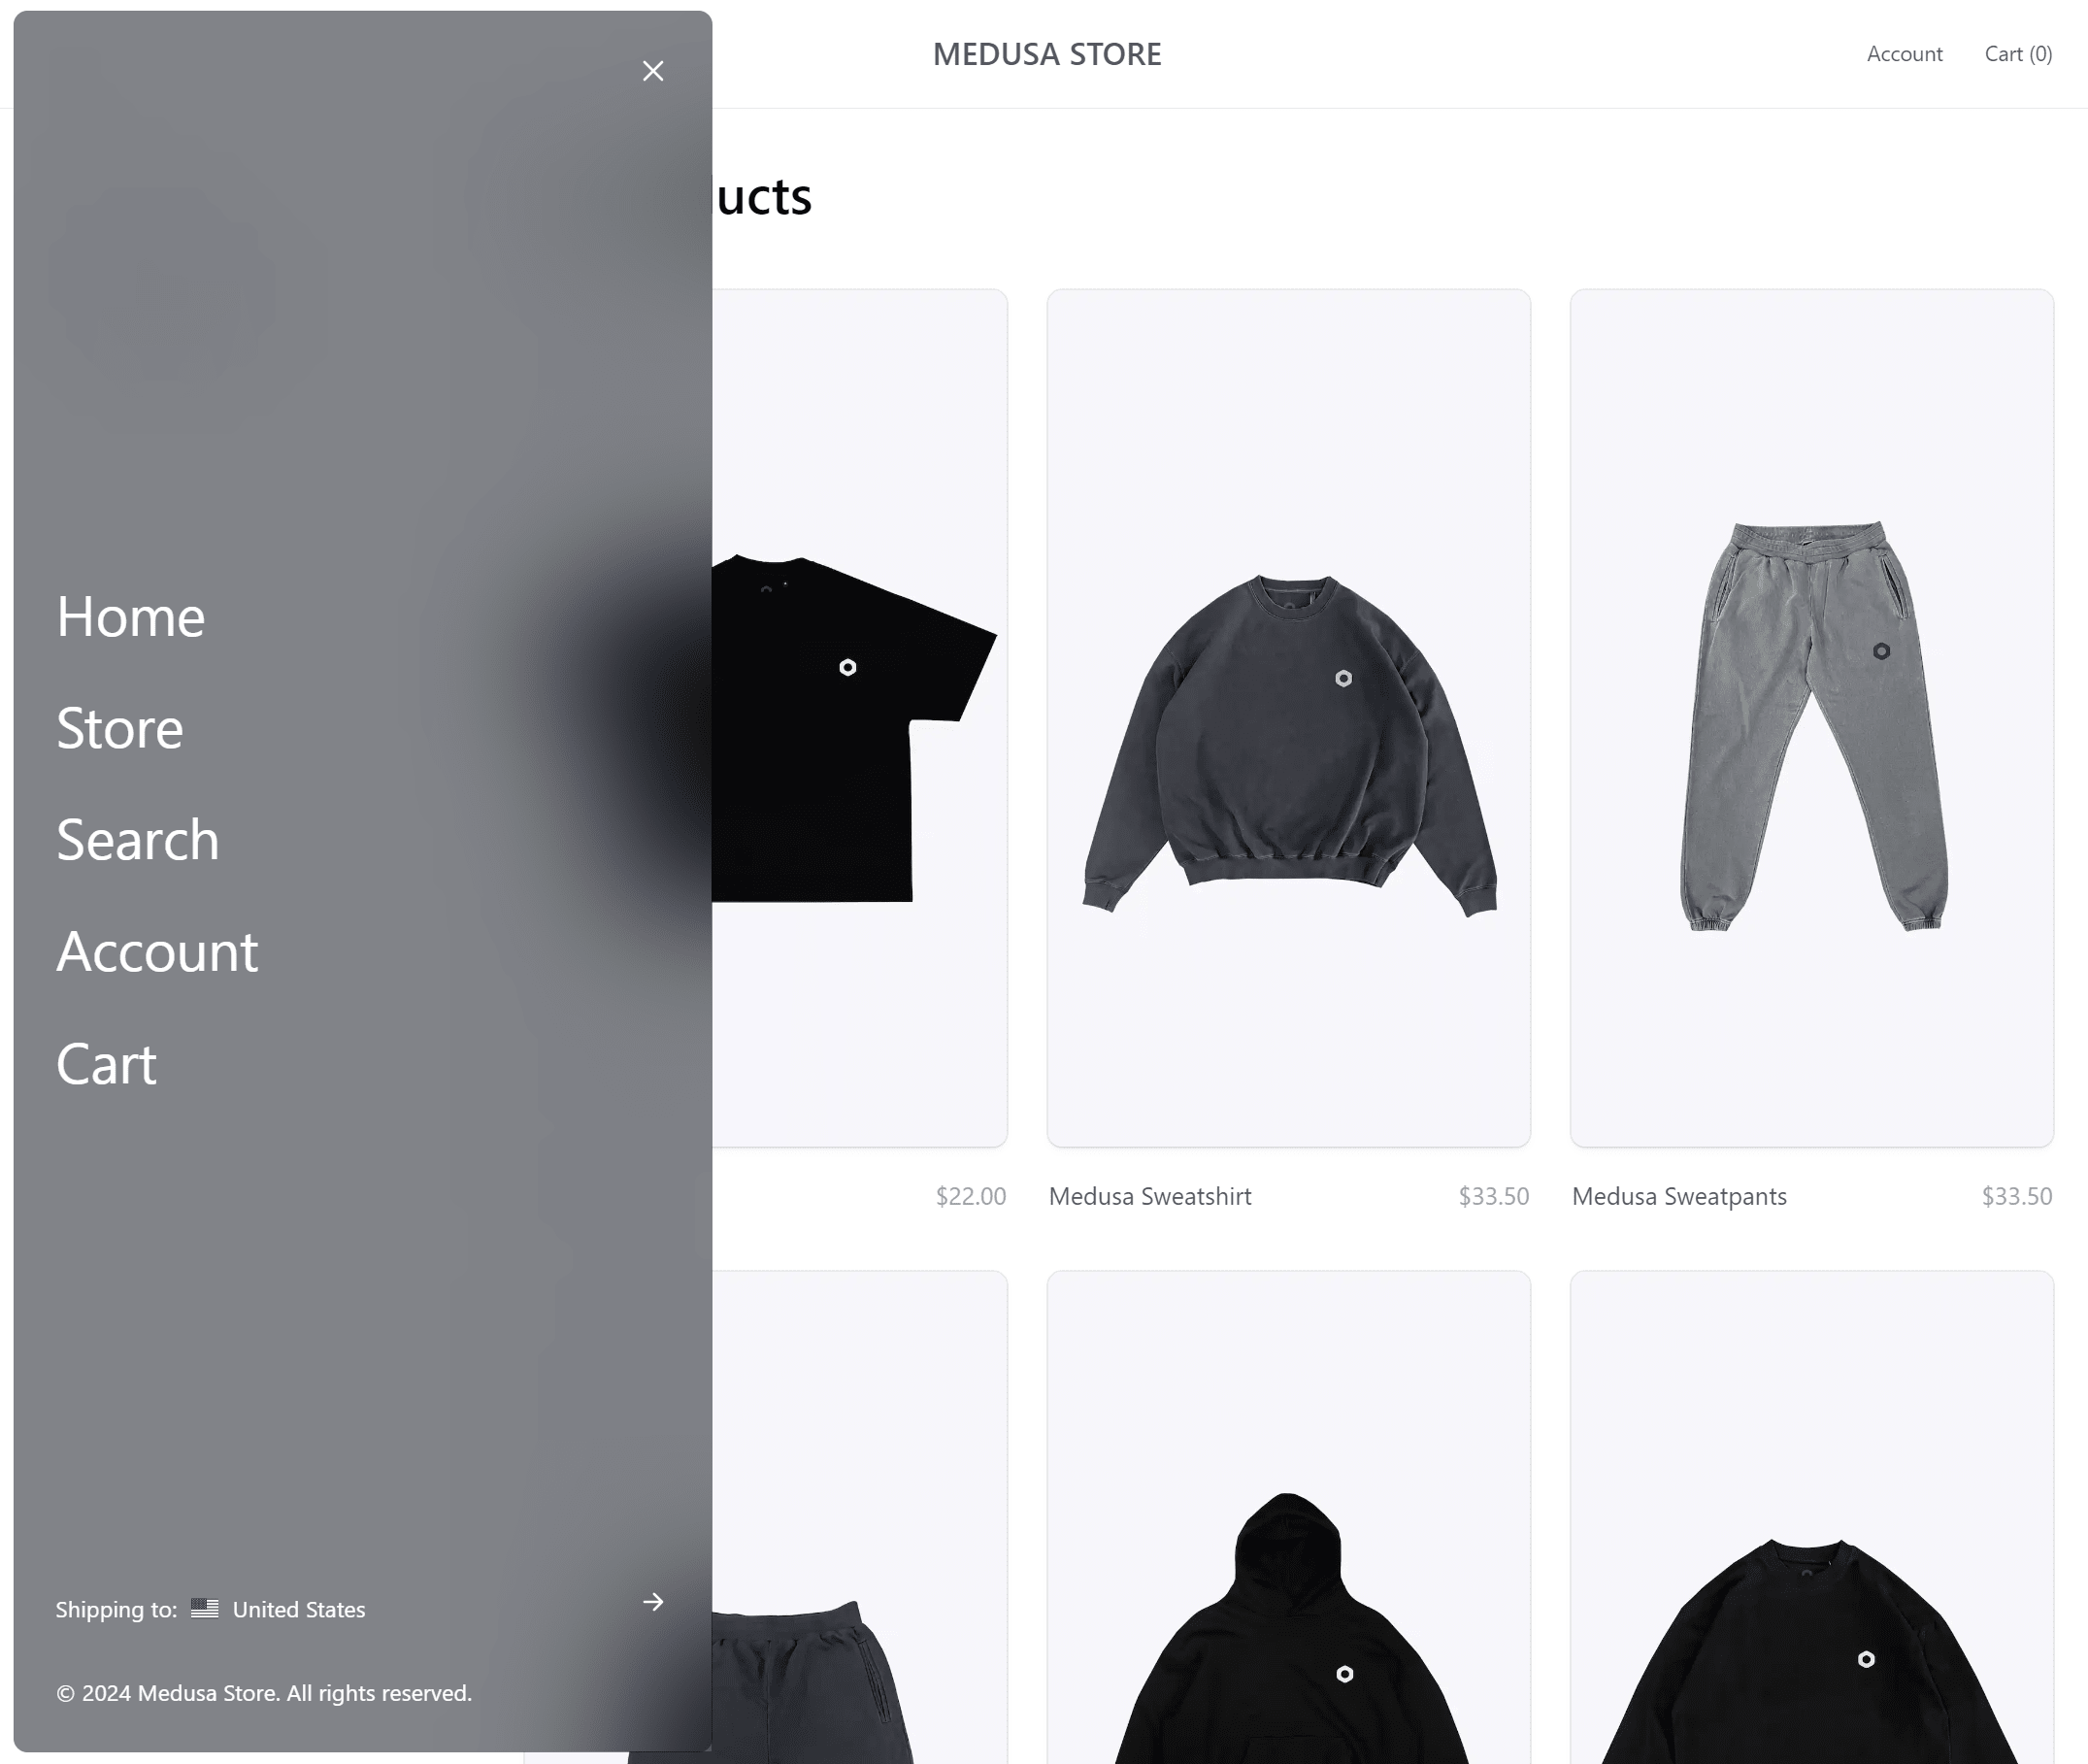
If everything went right, you'll see your webshop in a new tab with some dummy products:
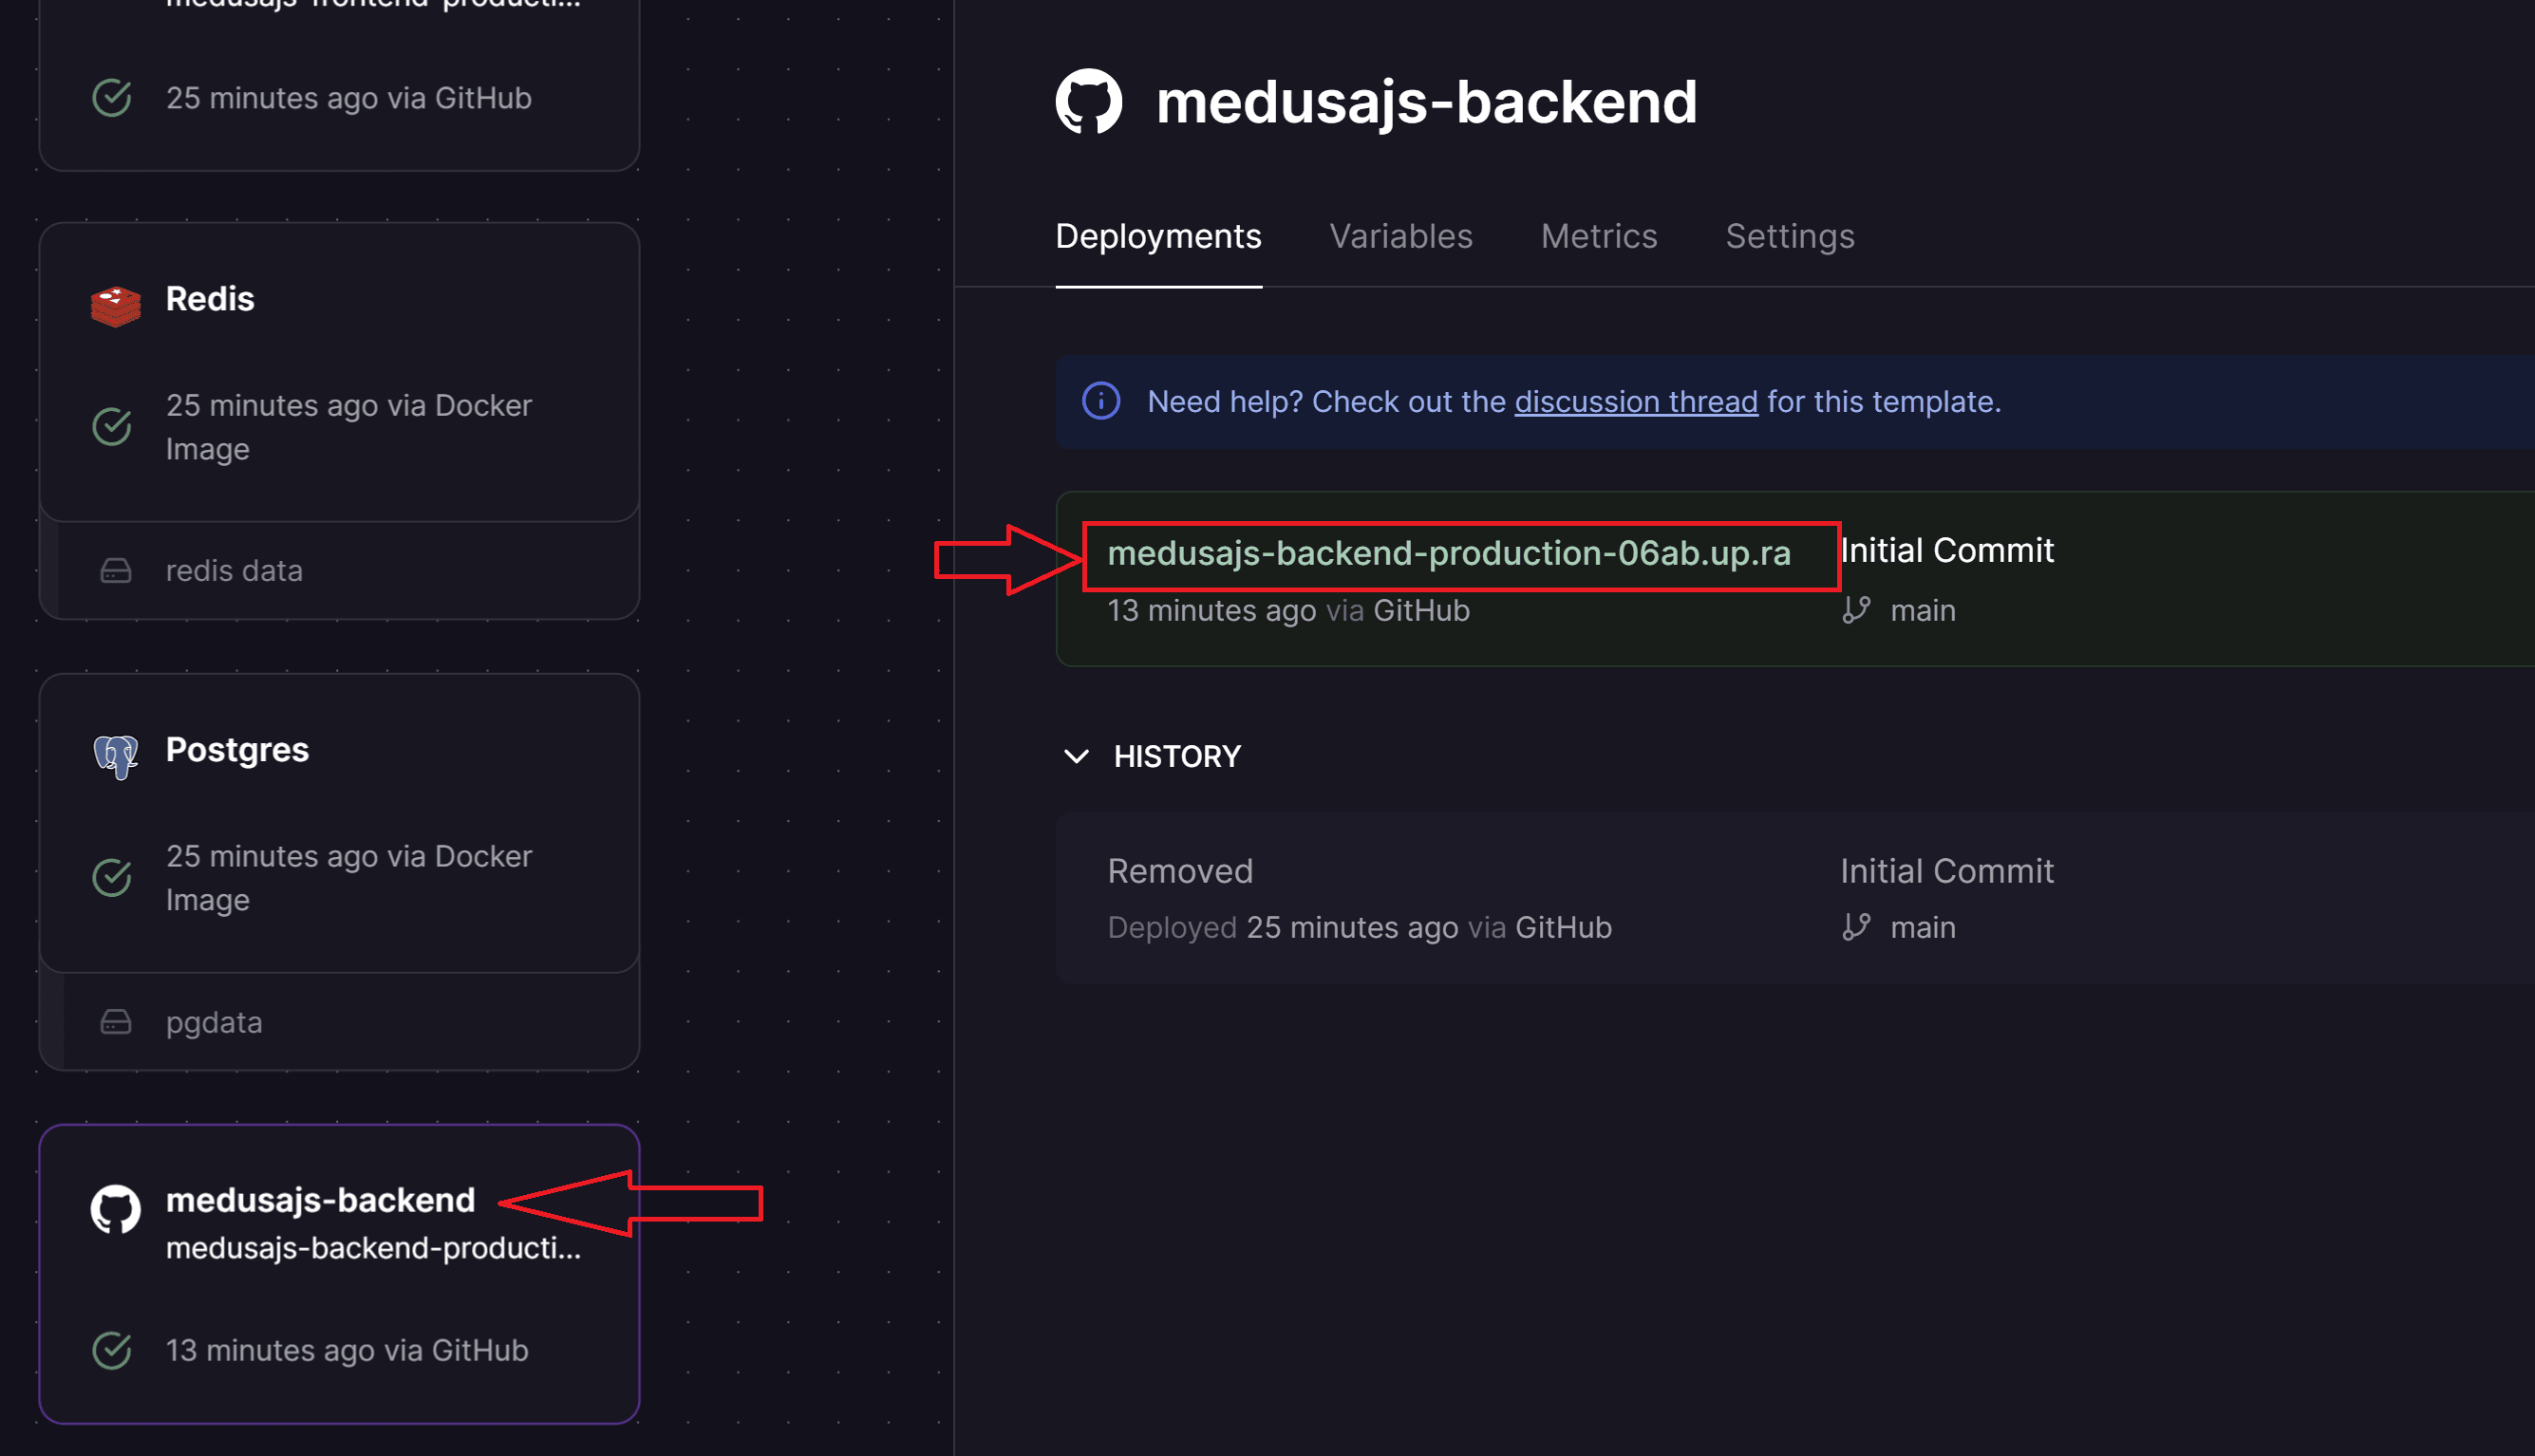
To manage your webshop, head over to the admin app by selecting your backend container, and clicking the Railway public url:
You will encounter this page, but don't worry:
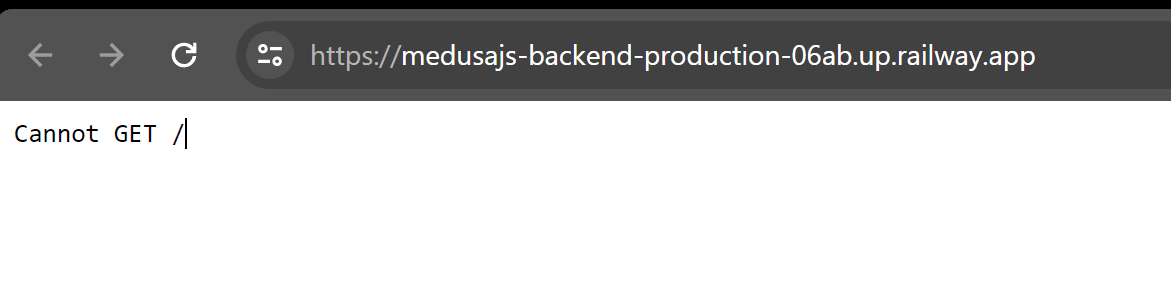
Your admin app is server on "your-url.com/app" so simple add /app at the end of the url and hit enter:
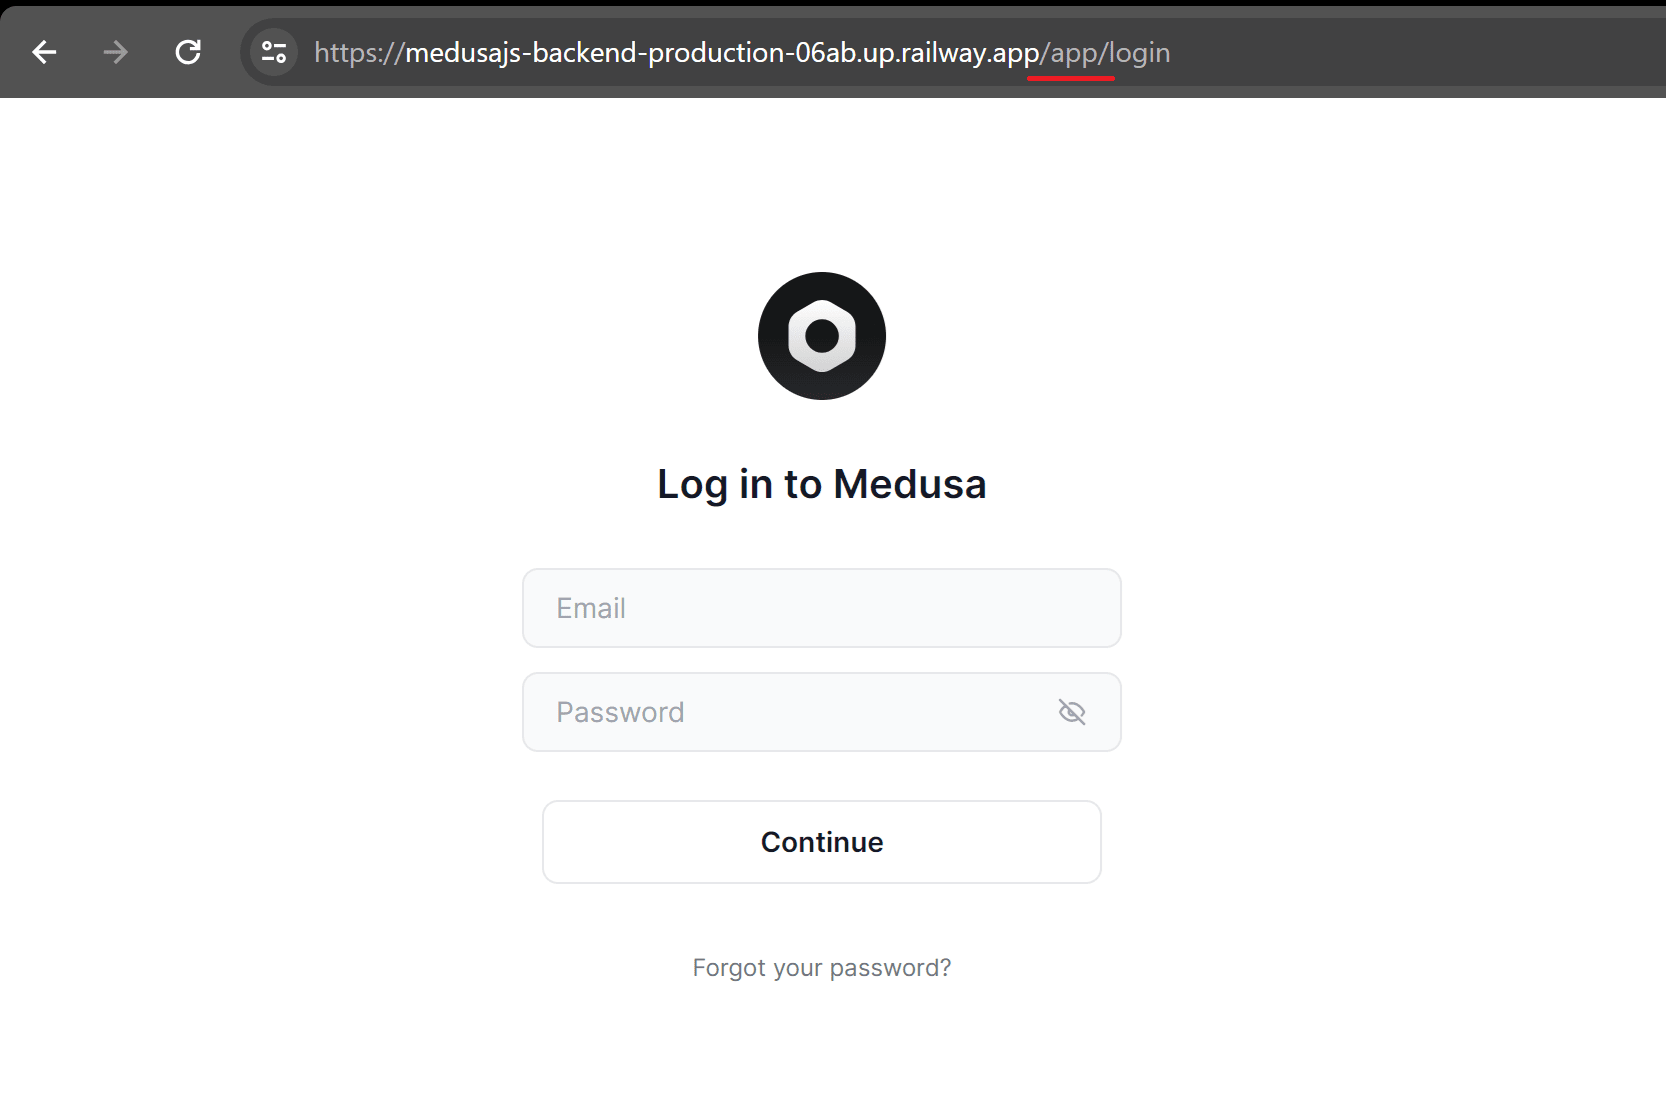
To login use the defaul admin user:
Email: [email protected]
Password: supersecret
The tutorial ends here, I wont bother writing about adding products to your webshop or deleting the dummy items, the process is pretty self explanatory, and in case you get stuck, you can find the official user guide here: https://docs.medusajs.com/user-guide
To learn how you can customize your storefron visit the part II of this tutorial
 Rasmus Puls